To access the Scheduler Settings, you must have Company Admin access or have been given access by a Company Admin.
To learn more about Access Levels, click here.
The first time you access the ShiftNote Scheduling Tools, you will be asked to go through a series of setup steps via the setup wizard. You can go back to edit this information in the Settings section of the Schedules area at any time. These settings will help you define the schedule Time Periods, and Positions.
Manage Time Periods
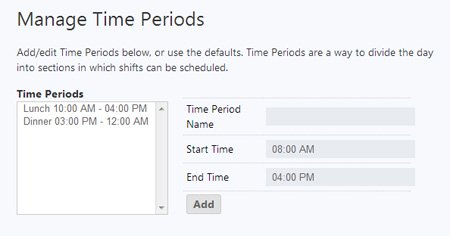
Time Periods are a way to section the day based on the different times your employees can be scheduled to work a shift. An employee working during the lunch Time Period will be able to work whatever hours you select that fall within the defined Time Period times. You need to have a minimum of one Time Period defined so that you can schedule employees during that time frame.
- To add a Time Period, go to the Settings section in the Schedules area and click Manage Time Periods.
- Type in a Time Period Name, choose the a start and end time, and click Add.
- To edit a Time Period, click on the Time Period on the left, and edit the information for the Time Period on the right.
Manage Locations
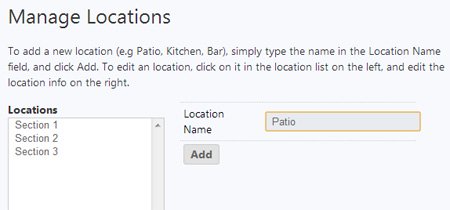
Locations are a way to specify where an employee will be working their position within the business. For example, if an employee is scheduled as a server in a restaurant, you can select that they also work in Section 1. Locations are optional.
- To add a Location, go to the Settings section in the Schedules area and click Manage Locations.
- Type in a Location Name and click Add.
- To edit a Location name, click on the Location on the left, and edit the information for the Location on the right.
- When you create a position, you can then choose which locations the position can be worked in.
Manage Positions
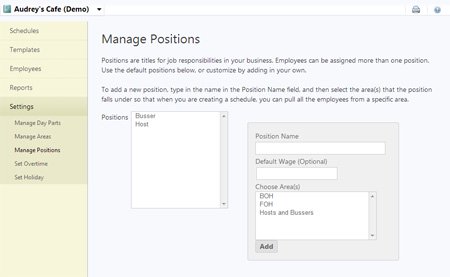
Positions are titles for job responsibilities in your business. Employees can be assigned more than one position.
- To add a position, go to the Settings section in the Schedules area and click Manage Positions.
- Type in a Position Name,choose a default wage if desired, and select which areas this position belongs to.
- Click Add
- To edit a Position name, click on the Position on the left, and edit the information for the Position on the right.